“I was honestly surprised by how much was available,” said Bevin O’Brien, who furnished her first college rental with pieces picked up for free from alleys and social media marketplaces.
She and a roommate even landed a free piano via Craigslist. They discovered two minivan bucket seats in an alley and converted them into porch chairs — a real conversation starter.
“A lot of times on Saturdays or during spring cleaning, people just want to get rid of things and don’t want to deal with them,” O’Brien said. “They leave items in their driveway or behind the house because it’s easier than hauling them away.”
Helen Marger, a Granbury, Texas resident, has been restoring furniture and decor to sell and use for over 15 years. She can spot what’s worth revamping and what’s good to use as-is.
“I remember a garage sale where an old, belly-shaped wheelbarrow, rusted red, caught my eye. I imagined someone using it as a planter on a front porch,” she recalled. “I took it to the shop, added a pot of red Impatiens and it sold the same day. I think I paid $5 and sold it for $50.”
It started as a hobby. Her brother would bring pieces he found beside the road. An old table, needing TLC and painted a perfect sunrise orange, became a puzzle table. A wooden toolbox served perfectly on a back porch for magazines. A rustic six-plank door with a keyhole and single hinge was turned into an American flag display in the kitchen.
She sold a few items to friends and eventually rented a corner in a shabby-chic store.
“There are even more opportunities now. People sell things on Facebook Marketplace, Nextdoor or Instagram,” Marger said. “That removes the need for a retail storefront.”
Finding Rehab Furniture Bargains and Making Them Pop

Marger shares these pointers for upcycling furniture for personal use or resale:
1. Garage sales often offer better bargains than thrift stores, and certainly more than vintage or antique shops.
2. Weigh your options.
“You can stain, paint or shellac furniture. With tables, doors and ladder-back chairs you can hand-letter words loosely or apply a stencil,” Marger said. Look up DIY ideas online before you hunt for pieces in alleys or at garage sales.
3. If you lack a truck or SUV, have a friend’s vehicle on standby so you can borrow it when a great find shows up. Keep a $20 gas card on the dashboard sometimes as thanks.
4. Think creatively. “Repurpose items for uses other than their intended function,” Marger advised.
Ideas include: a child’s wooden chair used as a bedside table or planter; an old door repurposed as a desktop or painted as a flag; cabinet doors painted with chalkboard paint and hung in a child’s room.
5. Favor solid wood over pressed wood or flat-pack furniture. Look for solid construction without broken parts, glued repairs or water damage.
6. Evaluate the structure, not the upholstery. Fabric is replaceable. You can often find affordable upholstery materials at thrift stores and charity resale shops.
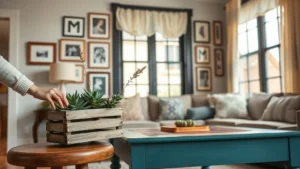
7. When photographing an item to sell, stage it. Display a wooden toolbox with magazines or gardening tools. If you painted a unique table, set a puzzle on it or style it for dinner with flowers, plates and bright napkins.
How to Stain Reclaimed Furniture
First, understand that staining and stripping are different. If you want to alter paint color or remove a glossy finish, that requires stripping. Staining refreshes sun-dulled or weathered wood or alters its tone without full removal.
To stain:
- Use fine-grit sandpaper to lightly sand the wood, smoothing bumps and blemishes because stains accentuate scratches and nicks. You’re staining, not sanding down to brand-new wood.
- Wipe the surface with a damp cloth or a tack cloth, a slightly sticky cloth sold at hardware stores.
- Pour a stain, such as Restor-A-Finish, onto a clean rag or sponge and rub it into the wood until you reach your desired shade. The color deepens with additional applications.
- Wait about 30 minutes to let it dry and evaluate the color.
- Apply more stain if desired. You can also finish with a spray of polyurethane or a clear coat to add shine and seal the stain.
How to Re-cover a Bench or Seat Cushion

Replacing upholstery can transform a piece rescued from the curb into a standout item.
Follow these steps:
- Cut your fabric to the seat’s shape, leaving about six extra inches on all sides.
- Secure one side of the fabric to the underside of the seat with tape.
- Use a staple gun to fasten it.
- Pull the opposite side taut and staple it down.
- Repeat the process for the remaining two sides.
- At the corners, trim excess fabric so roughly two inches remain as an overhang.
- Fold the excess under and hold it with straight pins.
- Create several pleats or folds to fit the fabric around the corner above the legs.
- Staple the fabric in position.
- Conceal staples and give a polished look by nailing upholstery tacks or decorative nails over them.
Katherine Snow Smith is a freelance writer and editor in St. Petersburg, Florida, and author of the book Rules for the Southern Rulebreaker: Missteps & Lessons Learned.