Growing up, my mom had to stop me from sipping pickle brine straight from the jar. Fast forward to my thirties and I’m doing picklebacks (a shot of whiskey followed by a shot of pickle brine) at the bar.
You get the idea.
So it was no surprise I eagerly signed up for a beginner pickling workshop at Urban Canning Company, a neighborhood food-preservation studio led by Illene Sofranko.
Between sampling her pickled beets, tomato jam and homemade peach soda, Sofranko quickly knocked down the rural clichés often tied to canning and pickling. The tastings, creativity and simplicity of the class showed how sustainable, useful and delicious food preservation really is.
She walked me through my first hot-water-bath dill pickle recipe — and now I’ll walk you through it.
Food Preservation Fundamentals

A quick web search on how to can or pickle can make the process seem overwhelmingly complex and terrify you with worst-case warnings about botulism.
“That’s not true at all,” Sofranko told me. “I debunk a lot of canning myths.”
If you follow the steps correctly, you’ll be perfectly safe.
Pickling and canning use the same basic method. A “hot water bath” can pickle nearly anything and is used to seal high-acid foods like fruit, salsas and relishes.
Most other vegetables and low-acid foods require a pressure canner, which is a more advanced technique we won’t cover here.
Sofranko relies on a simple brine ratio to determine how much liquid she needs for any pickling batch: a 1-1-1 ratio — 1 cup vinegar, 1 cup water and 1 tablespoon pickling salt. If you divide the number of jars by two, you’ll get the amount needed when using 16-ounce mason jars.
For instance: You have eight jars. Eight divided by 2 equals 4. So you need 4 cups vinegar, 4 cups water and 4 tablespoons pickling salt.
“You can make one jar, or you can make 600 — it’s your call,” she said.
Must-Have Pickling Gear

A one-time purchase will have you set for years. You likely own many of the items already, aside from a few inexpensive essentials.
To do your first batch of pickles you’ll need:
- Boiling water canner with rack (also called a hot or boiling water bath): $24.99
- Jar lifter (canning tongs): $6.32
- Canning funnel: $2.59
- Mason jars with lids and bands: $8.69 for 12
- Dish towel
- Pot holders
- Ladle or plastic pitcher
- Nonreactive pot (stainless or copper)
- Measuring cups and spoons
- Food items (white or apple cider vinegar, pickling salt, spices and cucumbers)
You can assemble supplies piece by piece or buy a canning kit. There are plenty of kits online and at local stores like hardware shops or big-box retailers. Expect the initial equipment cost to be around $40; watch for shipping costs if ordering online.
How to Make Pickles (The Basics)

The method is straightforward: prep cucumbers, season the jars, boil a brine, combine and seal the jars, then process them in the canner.
Don’t be intimidated by the step count. These detailed directions will guide you through your first attempt at pickling.
Urban Canning Company supplied this recipe, but feel free to adjust it to suit your palate. I’ve made multiple batches at home since taking the class and tried different vegetables, spices and flavor combinations. Pickling is actually enjoyable — you’ll see.
Ingredients for 8 16-ounce jars of pickles:
- About 1 gallon of pickling cucumbers
- 4 cups apple cider vinegar
- 4 cups filtered water
- 4 tablespoons pickling salt
- 8 teaspoons dill seed
- 8–16 garlic cloves
- 4 teaspoons black peppercorns
- 2 teaspoons red pepper flakes
Pickling Steps:
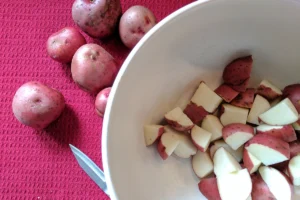
- Immerse whole cucumbers in a vinegar bath for roughly 10 minutes to remove surface bacteria. Use a mix of one part white vinegar to three parts water. Unless the liquid becomes dirty, you can reuse it for the entire batch.
- Trim the ends and slice the cucumbers into spears of your preferred size. Test them against the jar to ensure they’ll fit. Save tips and trimmings in a bag to make relish later.
- Fill the boiling-water canner about halfway and heat on a back burner, but don’t bring it to a boil yet.
- Wash lids, jars and bands with hot, soapy water.
- Divide spices into jars. Add 1 teaspoon dill seed, 1–2 garlic cloves, ½ teaspoon peppercorns and ¼ teaspoon red pepper flakes to each jar. Adjust amounts to taste.
- Pack the jars with cucumber spears, arranging them like Tetris, but avoid forcing them in and crushing them. They can be snug but not squashed.
- Make the brine in a nonreactive pot by combining the apple cider vinegar, filtered water and pickling salt. Bring to a boil.
- Meanwhile, bring the water in the canner to a boil.
- When the brine is boiling, either ladle it into each jar using a funnel, or pour it into a pitcher and then through the funnel. Fill each jar nearly to the top, leaving a one-inch headspace — about the second line from the rim or where the jar neck starts.
- Wipe jar rims with a damp cloth to ensure a clean seal.
- Put lids and bands on each jar. Tighten the bands just finger-tight — don’t overdo it.
- Once the canner water boils and the rack is ready, use the jar lifter to place sealed jars on the rack. Lower the rack into the boiling water, making sure there’s at least 1–2 inches of water covering the jars. Add water if necessary and wait for it to return to a boil before starting the timer. If you lack a rack, do not set jars directly on the pot bottom — direct contact can cause cracking or even shattering.
- After the water returns to a boil, cover the pot and set a timer for 10 minutes.
- When time is up, remove the lid and lift jars out individually with the jar lifter. Set them on a dry dish towel and leave them untouched to cool for 24 hours. You should hear lids “pop” as they cool — a good sign that a vacuum seal formed.
- After 24 hours, check that lids are sealed and label each jar with the date. Press the lids; any that flex need refrigeration because they aren’t shelf-stable.
If a jar has less brine after processing, that’s fine — some liquid may siphon out during processing due to tipping or temperature changes. It might not be pretty, but according to Sofranko it’s perfectly edible for 10 to 20 years.
If all goes well, your pickles will be preserved for the long term.
“It’s like a time capsule. Nothing can happen inside,” Sofranko said.
Any leftover brine can be stored, reheated and reused later.
How Pickling Can Cut Your Costs

Although preserving food often starts as a hobby, it can save you money over time. Once you’ve bought the gear, the ongoing costs are mainly vinegar, spices and produce.
Grocery Savings
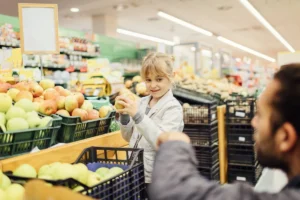
Sourcing produce locally, buying from a CSA or shopping farmers’ markets cuts food miles, reduces packaging and helps farms move excess or oddly shaped vegetables.
Buying in bulk offers the best value for pickling. Many farms sell crates or pounds of produce for reasonable prices (often $10 or less). It supports farmers, feeds you and benefits the local economy. Sofranko believes the advantages extend further.
“When you invest in local bulk items, you’ll save on healthcare costs in the long run,” Sofranko said.
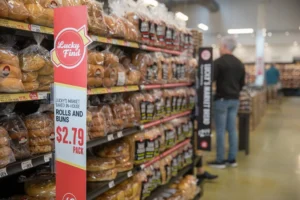
A jar of store-bought pickles typically costs $2 to $4. Sofranko estimates homemade jars — excluding labor and overhead — run about $1 to $1.25 apiece. One crate of cucumbers yields 56 to 60 jars. That’s plenty for most households.
The savings increase if you grow and pickle from your own garden.
Reducing Food Waste
It’s easy to toss vegetable scraps, but you can repurpose those bits into pickles.
From broccoli stems to the purple ribs of swiss chard, many parts are perfectly fine for pickling.
Serving them as a side or adding them to a charcuterie board can elevate a meal without buying extra ingredients.
The Snowball Effect
Since Sofranko’s class and beginning my own pickling experiments, I’ve become curious about using more leftovers creatively.
She runs an “Urban Tips” blog with ideas for repurposing scraps — like using citrus peels for cleaners, making ginger bug soda or finding additional uses for pickle brine.
Once you start experimenting and stretching ingredients, a habit of buying and wasting less can take hold.
Gifting
Spoiler for friends and family: you might receive pickles, preserves or jam this holiday season.
It’s labor-intensive at first, but after you learn the ropes you’ll churn through batches and accumulate jars to spare.
Give extras as homemade gifts — especially for pickle enthusiasts. Try pickled versions of favorites like peppers, Brussels sprouts or asparagus.
Homemade jars are thoughtful presents that cost far less than store-bought gifts, and you can share with more people for the same amount of money.
After all, the way to many hearts is through good food.
Reusing Jars
You can reuse the same jars repeatedly unless they’re damaged; the lids are the only part that can’t be reused for hot-water-bath canning and must be replaced each time.
Still, the jars are handy for storing dry goods like beans, rice and sugar, or for serving salads and smoothies in Instagram-friendly containers.
They also make charming decor as candle holders, string-light vessels or vases for a DIY home makeover.
Advantages of Pickling

Quality of Food
There’s value in knowing exactly where your food comes from. Whether you grew it, harvested it or bought it locally, canning and pickling eliminate many preservatives and additives found in commercial products.
What you jar is exactly what you get. I’m personally not fond of extreme heat, so I rarely add intense spice to my pickles. But if you crave heat, sweetness or complex flavors, you can season jars to your liking. Hello, spicy asparagus!
Sofranko draws ideas from cocktail flavors and translates them into her jams and pickles, often with imaginative results.
Food Security
Historically, canning and pickling were seasonal practices to preserve harvests and sustain families through winter.
Today we enjoy broader food access year-round, but when storms or emergencies approach, stores can empty quickly. Having a pantry stocked with shelf-stable, ready-to-eat food lets you skip the panic.
Sofranko’s household keeps about four years’ worth of canned and pickled supplies, so they never worry about running out.
Mental Well-Being
Chopping through gallons of cucumbers might sound monotonous, but Sofranko finds it calming.
“It clears your head, and you feel better after. You can see what you accomplished, and you get to eat the reward. It tastes better,” she said.
Cooking can be meditative. Pickling offers a simple, grounding practice in our hectic lives.
Community
Think back to historical images of canning — people gathered around a table, slicing vegetables and chatting.
“That was a community experience. They loved getting together and doing this. It was part of their tradition,” Sofranko said.
Keep the custom alive by inviting friends for a pickle party: roll out the produce, pour some wine and work together.
Working as a group speeds the process and makes it more enjoyable. It’s a wholesome activity for kids or a sociable alternative to a night out.
What was once tradition could become our future habit — one pickle at a time.
Alexandra Carter is a staff writer at Savinly. She has never picked a peck of pickled peppers.