With the official first day of autumn behind us and Halloween fast approaching, it’s clear: Summer is over, and it won’t be back until next year.
And while that’s no big deal for those of us in Florida, all my northern pals consistently point to one big downside of winter: the sudden scarcity and high price of fresh produce.
Having endured one (and only one) Ohio winter, I can attest: Once winter arrives, it feels like someone drained the color from the grocery aisles… unless you’re ready to pay top dollar.
It’s rough enough dealing with snow and cracked lips. But six months without pulpy fruit smoothies or juicy berry cobblers? Or paying an arm and a leg for a tiny container?
Nope. Not happening. Fortunately, it doesn’t have to be that way.
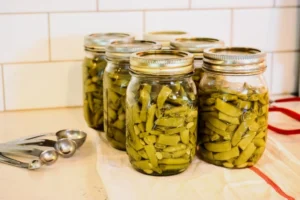
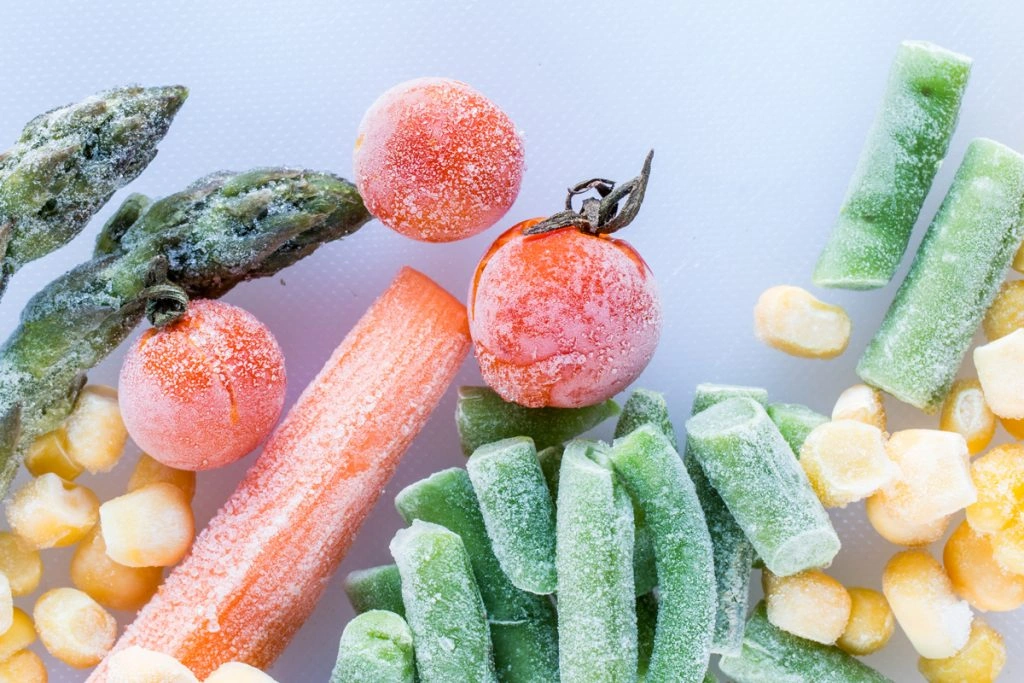
In this guide, we’ll show you how to freeze vegetables and fruits so you can stash away summer and fall produce and brighten — and flavor — your winter meals.
Basic Rules for Freezing Fruits and Vegetables
Before diving into specifics for each fruit and vegetable, let’s cover a few simple rules.
Even under ideal conditions, you probably won’t end up with perfectly crisp fruit after freezing and thawing. The flavor will still be there… but you likely won’t want to bite into an apple that’s been frozen.
Why? Remember basic science: Water expands when it freezes.
All that juicy interior of a peach or pear is mostly water. When it freezes, ice crystals can break cell walls, leaving the thawed fruit a bit… mushy.
For that reason, frozen produce often shines best in cooked dishes. Which is great — think blueberry muffins and banana bread.
You can also enjoy frozen fruit before it’s fully thawed.

Smoothies are the obvious choice, but if you haven’t tried freezing grapes to snack on, do it — they’re like tiny grape slushies (in other words: amazing).
There are, however, ways to improve your results when you reach into the freezer for a taste of summer.
First rule: Only freeze the best specimens.
Freezing changes texture and can reduce some nutrients, so start with fruit and vegetables that have the most quality to spare.
Bruised or battered produce is great for immediate use (and waste reduction), but for long-term freezing, pick the best.
The other tip? Most produce benefits from a quick blanch before freezing.
Yes, it’s an extra step, but it’s an easy one.
How to Blanch Fruit and Vegetables
Blanching times and steps vary by item, but the basic approach is straightforward.
Briefly plunge the produce into boiling water, then immediately move it to an ice bath to stop cooking.
This quick heat treatment halts enzymes that degrade color, taste and nutrients, meaning your frozen items will taste better weeks later.
Ready to start freezing? Below are our top tips for preserving popular fruits and veggies.
How to Freeze Fruit

Want your Thanksgiving apple pie to taste fresh? Craving a peach cobbler in February?
Here’s how to freeze fruit so it’s ready for those moments and more.
Freezing Apples
Blanching time: one minute for thick slices
Ice-bath cooling time: one minute for thick slices
Blanching apples is optional, but you should core and slice them.
This is also the moment to peel them unless you plan to keep the skins on for your recipes.
To prevent browning, treat slices with ascorbic acid — i.e., lemon juice.
Dip slices in diluted lemon juice (about 1 tablespoon per ½ gallon of water), dry them quickly, then spread on a baking sheet and freeze uncovered — a technique called dry-freezing.
When frozen solid, transfer to freezer bags; they’ll keep six months to a year.
You can also use a salt soak instead of lemon or pack them in sugar syrup if you want a sweeter, ready-to-eat result.
Freezing Peaches
Blanching time: 30 to 60 seconds for three or four peaches at once
Ice-bath cooling time: about one minute
The perk with peaches is that blanching makes the skins slip right off.
Cut an “X” in the bottom of each peach and lower three or four into boiling water. After about a minute, move them to the ice bath until cool enough to peel.
Slice, dry, give the acid treatment (like apples), then freeze on a tray before packing in a freezer-safe container.
You can also pack peaches in syrup or water, or sprinkle with sugar to draw out juices before freezing.
The same approach works for nectarines, apricots and other stone fruits.
Freezing Pears
Rather than blanching pears, the preferred method is to use a sugar syrup.
Mix 3 cups sugar into 4 cups warm water (for a lighter option, try 1 cup sugar). Bring to a boil, add peeled, cored, lemon-treated pear slices, and simmer for two minutes.
Cool the syrup and pears, pack the fruit into freezer-safe containers leaving about an inch headspace, pour in cooled syrup to cover, and put a layer of wax paper on top before freezing to prevent the slices from floating and discoloring.
Freezing Cherries

Cherries are one of the best summer fruits (personally, a top favorite) and they’re incredibly easy to freeze.
Because they’re small and delicate, skip blanching.
Wash, pit and remove stems, then spread them on a baking sheet to freeze. You can leave them whole or halve them.
When solid, move to freezer bags or containers…
… and get ready for mid-winter cherry cabernet brownies. Trust me, fresh frozen cherries take that recipe to the next level.
You’re welcome.
Freezing Berries
Berries are easy: Wash, dry, freeze flat, then transfer to a bag.
Strawberries are the exception — hull them first, and they hold up better if frozen in a cooled sugar syrup. Don’t add hot syrup to berries! They’re too small for blanching.
Thawed berries will be softer, so save them for baking — muffins, cakes, and other treats — rather than eating them by the handful like fresh berries.
Not much of a sacrifice, right? Delicious.
Freezing Melons
Some melons (like cantaloupe) handle freezing better than others (like watermelon), but generally they do best in a cold sugar syrup.
Pick melons that aren’t overripe, cube or scoop them, dry-freeze on a tray, then pack into bags and cover with cool sugar syrup.
You can also freeze without sugar — just plan to enjoy them a bit frosty for best texture.
Pureed melon can be frozen in ice cube trays for smoothies and shakes.
Freezing Citrus
It may surprise you, but citrus freezes easily with minimal prep!
Lemons and oranges may keep flavor better in a wet-pack (in sugar syrup in a jar), but you can also freeze wedges dry in a container; be aware this can increase bitterness.
Pre-slice or separate into wedges so you won’t have to deal with peels after thawing.
How to Freeze Vegetables

It’s not only sweet fruit we miss in winter: fresh vegetables disappear too!
If you want to enjoy your colorful veggies during snowy months, here’s how to store them.
Freezing Tomatoes
Blanching time: 60 to 90 seconds
Ice-bath cooling time: about one minute
Although technically a fruit, tomatoes are staples for savory winter dishes.
They won’t be caprese-ready after freezing, but they make excellent sauces and stew bases.
Blanch whole tomatoes in boiling water for a bit over a minute, transfer to an ice bath with a slotted spoon — the skins will slip off.
Slice or crush them over a dish to save the juices and pour into freezer bags in portions that match your recipes (I use 2-cup portions).
They’ll freeze into a solid block, so press out excess air and flatten the bag for easier storage. Frozen tomatoes can retain good flavor up to 18 months.
Freezing Cucumbers
Surprisingly, cucumbers can be frozen despite their water content. The trick: turn them into pickles first.
You don’t have to peel them, though store-bought cucumbers may have a wax coating you’ll want to wash off.
Slice uniformly and layer with salt (about 1 tablespoon per quart of sliced cucumbers). Some recipes add sliced onions.
Let them sit for two hours or more, rinse, then cover with a brine of 1/2 cup white vinegar and 1 1/2 cups sugar. Pack into freezer-safe containers or jars.
Wait at least a week before eating your frozen pickles; they’ll keep for up to a year.
Freezing Radishes
Blanching time: two to three minutes
Ice-bath cooling time: about one minute
For radishes, keep it simple: clean and chop, blanch two to three minutes, freeze flat, then move to a freezer-safe container.
Then serve them braised in butter or pan-roasted as a robust winter side.
Freezing Leafy Greens

You won’t get salad-quality greens from the freezer, but you can keep enjoying kale smoothies and cooked greens all winter.
Wash and thoroughly dry leaves, remove stems, portion into freezer bags, squeeze out air, and you’re set: ready-to-use greens through spring.
Freezing Bell Peppers
Blanching time: two to three minutes
Ice-bath cooling time: about one minute
Remove tops, seeds, and cut into 1/2-inch pieces before blanching.
Peppers are hearty enough to handle boiling for a bit; dry-freeze them first, then transfer to bags. Reheat by steaming or microwaving.
Freezing Carrots
Blanching time: two minutes diced; up to five minutes for small whole carrots
Ice-bath cooling time: match blanching time
These will be far better than the prepackaged frozen carrots you buy.
Cut to size, blanch, portion into bags, and freeze — easy and superior.
Freezing Zucchini
Blanching time: one to three minutes
Ice-bath cooling time: three to five minutes
Zucchini bread in January is doable.
Wash, slice, blanch, dry-freeze on a tray, then pack into freezer bags.
Freezing Corn
Blanching time: two minutes
Ice-bath cooling time: about 30 seconds
Want sweet corn after summer ends?
Shuck the ears and remove kernels from the cob. Blanch for about two minutes, drain, and briefly chill in iced water.
Dry-freeze or pack in measured portions — corn tends to clump, so avoid freezing a block larger than you’ll use at once.
Your Turn: Do you freeze fruits or vegetables? How do you use them when you pull them from the freezer?
Jamie Cattanach is a staff writer at Savinly. Her work has appeared at The Write Life, Word Riot, Nashville Review and elsewhere. Find @JamieCattanach on Twitter to say hi.